Being home sick today allows me to catch up on projects that I've completed. So you finally get to see! So with many thanks to my sorority sister, Heather, for the graciously free pillowtop mattress, and the $20 bedrails and te $40 boxspring (thanks, CraigsList!), I was set out to finish putting my bed together and give it a little flair. I found another
blog (yes, via Pinterest) and kind of adapted their pattern to fit the little money I had and the supplies I had in comparison! Always adapt your plan, right? You can follow their plan... or mine. Take your pick! :)
 |
| Perfect! |
So, going along with the black and white that I have all over my room, I wanted a fabric simple enough but still had the floral-y, damask-y print that you all know I love so much! And then I found this:
I knew it was just the piece! So then I got to work. Molly decided to help, so you'll see her featured a few times... "helping." First up, getting the wood! Thank god for Lowe's and their free wood cutting (up to so many pieces, of course). The blog I used as my guide cut a piece of plywood 39"x59"; I (brilliantly) didn't actually measure the width of my bed, but knowing it was pillowtop, added an inch on each side, just in case. So, in my case, my plyboard sheet is 40"x60". Thankfully, going up to 60" was a smart call - it perfectly matches the width of my bed. Whew, close call! Secondly, take your massive trip to Hobby Lobby and get your batting, foam and fabric of choice. Foam is a little more expensive than I thought, but HL carries big, pre-cut sheets. Always remember, too, that if you have a smart phone, HL will allow you to pull up their coupons on your phone and they'll take it! Helloooo 40% off expensive foam! And then home, and to work!
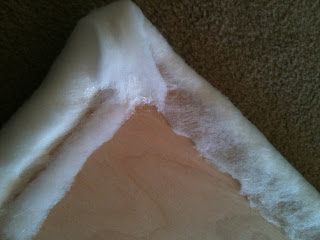
Again, as I (for this time being) refuse to buy a staple gun, this is all hot glue. A little tricky at times, but overall works quite well and I am proud to say that this was all constructed with hot glue... and it stays! Success! First up, foam on the board. If you check out the blog that I followed, they did theirs with wood as a frame, because they were setting up to use a nailhead trim to set up a fancy-schmancy headboard (see the end of their blog for details). I, however, decided that with such a patterned fabric, nailhead trim was not for me, and that I wanted it to be padded all over. So, I pulled the foam to be just over the edges of the wood so there were no rough edges.
After, the batting. Easy enough!
And lastly, fabric fun!
 |
| Molly... helping. |
Voila! That's it! You've got an easy-peasy pretty headboard (stupid things are darn expensive from furniture stores) that matches your room, your style... or just gives your room a little extra flair!
 |
| Yep, right at home. |
The only thing I need to do is figure out how high I want it to be. Right now, I'm okay with where it's at but at some point, may decide to install it higher. Because it's so tall, right now it's just sitting on the floor! More to come, stay tuned! :)


No comments:
Post a Comment